This week involved a lot of switching out primitive geometries for GLTF models, which led to their own set of issues such as larger file sizes, new snapping points and repositioning/resizing everything within the scenes.
I started this process with the Warehouse scene, screenshots of which can be seen below. In addition to bringing the GLTF model into a newly created warehouse.html file, I also added lights in the scene, a bright green "shipping platform", an image plane to display instructions in front of the platform, and some boxes on the shelves that will serve as spawn points for furniture pieces when the Finder clicks on them. This took ~4hrs, and I had to relay information about how the scene looked in A-Frame to Maxime since it was quite different from its appearance in Substance. On average, it currently takes about 3-5 seconds to load the Warehouse scene with all of its 3D assets and sound files.
How the Warehouse looked when I initially imported it:
 How the Warehouse looks now:
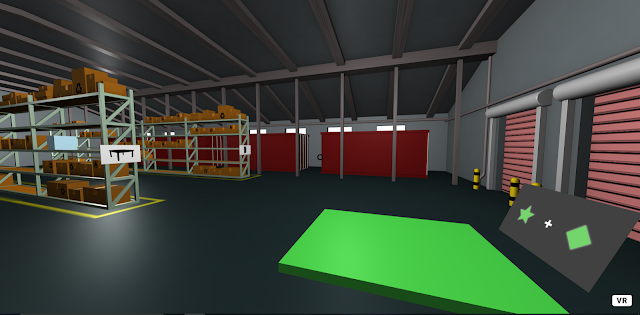
I hid sound emitting sphere entities inside the red crates around the room and the warehouse fan sound plays from the ceiling overhead (~2hrs). Next steps for this scene would be to make the walls and ceiling actually "physical" so that objects cannot be thrown out of bounds.
This week I also worked on creating images for the instructions (~1hr). At this current stage, we are focused on getting only a table as a buildable piece of furniture. This includes a table top piece and four table legs. The instructions need to be simple enough to be understood without text and uncluttered (see below). The background also needs to be a neutral colour that fits in with the environment (i.e. Living Room or Warehouse) and is not the same colour as any of the furniture pieces.


As aforementioned, I also worked on importing the updated Living Room GLTF to the scene (~1.5hrs). This required repositioning the lights and sound emitter. The model at the moment is still lacking textures. I also added some "solid" walls around the room so that objects can no longer be thrown out of bounds. A screenshot can be seen below.

I started this process with the Warehouse scene, screenshots of which can be seen below. In addition to bringing the GLTF model into a newly created warehouse.html file, I also added lights in the scene, a bright green "shipping platform", an image plane to display instructions in front of the platform, and some boxes on the shelves that will serve as spawn points for furniture pieces when the Finder clicks on them. This took ~4hrs, and I had to relay information about how the scene looked in A-Frame to Maxime since it was quite different from its appearance in Substance. On average, it currently takes about 3-5 seconds to load the Warehouse scene with all of its 3D assets and sound files.
How the Warehouse looked when I initially imported it:


I hid sound emitting sphere entities inside the red crates around the room and the warehouse fan sound plays from the ceiling overhead (~2hrs). Next steps for this scene would be to make the walls and ceiling actually "physical" so that objects cannot be thrown out of bounds.
This week I also worked on creating images for the instructions (~1hr). At this current stage, we are focused on getting only a table as a buildable piece of furniture. This includes a table top piece and four table legs. The instructions need to be simple enough to be understood without text and uncluttered (see below). The background also needs to be a neutral colour that fits in with the environment (i.e. Living Room or Warehouse) and is not the same colour as any of the furniture pieces.


Other tasks I worked on this weekend include creating the JSON file for the object templates (~1hr). This file would allow for the global use of these objects across various files. For instance, creating instances of the same pieces in the Living Room as in the Warehouse.
For example:
{
"table":
[
{
"id": "tableTop",
"class": "grabbable",
"furniture": "tier: 0; totalSnapPoints: 4;",
"mixin": "part",
"scale": "2 2 2",
"gltf-model": "#tableTopModel",
"body": "type: dynamic; mass: 20; shape: none;",
"shape__main": "shape: box; halfExtents: 0.72 0.061 0.72",
"position": "0 0.09 0",
"rotation": "180 0 0",
"a-entity":
[
{
"position": "1.13 -0.08 0.73",
"class": "snapPoint",
"mixin": "sphereCollider",
"snap-point": "snapId: 1; snapTo: 2;"
}
]
}
]
}
As aforementioned, I also worked on importing the updated Living Room GLTF to the scene (~1.5hrs). This required repositioning the lights and sound emitter. The model at the moment is still lacking textures. I also added some "solid" walls around the room so that objects can no longer be thrown out of bounds. A screenshot can be seen below.

Comments
Post a Comment